Epi Info™ User Guide Form Designer Introduction
Form Designer
Introduction
In Epi Info™ 7, the Form Designer and the Enter modules work together to design the data entry process and collect data. Form Designer is the tool used to design the survey, questionnaire, or form, tailor the data entry process, and specify the tab sequence. It is where you customize any data validation you want to occur when the form receives data in the Enter tool.
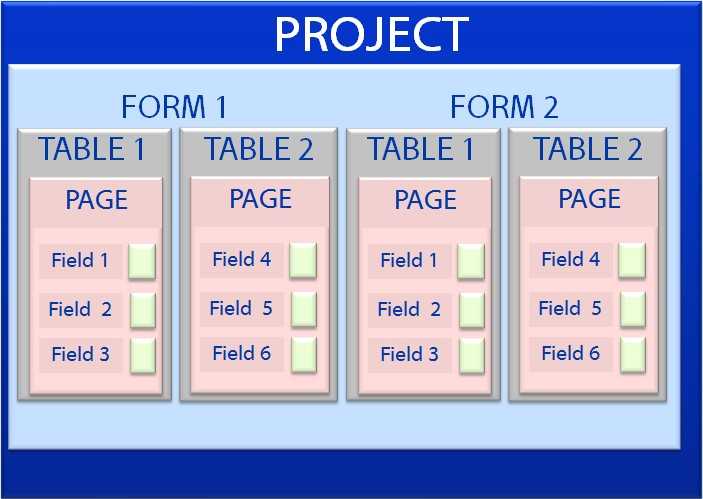
Data collection in Epi Info™ 7 is organized by projects. Each project can have one or many forms which can have one or many pages. On each page, one or many data entry fields are added which collect individual data elements.

Fields added to a page can be any of a variety of field types corresponding to the type of data needed and the kinds of analyses that can be anticipated. Field types range from simple labels, text, numeric, and date fields to more advanced fields like drop-down lists, data grids, and command buttons. A list of the available field types is shown in the topic on Fields
Epi Info™ 7 normally uses the Microsoft Access database format. If no changes are made to the default settings when new projects are created, data are stored in the project’s MS Access data file having an “.mdb” extension. If you have access to a Microsoft SQL Server database, Epi Info™ 7 can natively use this format for data storage, instead of the MS Access format. Epi Info™ 7 handles all of the database management aspects such as the table creation, managing keys, relationships, and other information storage details. Since the process of designing the form also defines the database, the Form Designer can be regarded as a type of database design environment.
Form Designer
- Navigate the Form Designer Workspace
- Open a Recent Project
- Create a New Blank Project and Form
- Before You Begin
- Customize the Form Designer
- Set a Default Prompt or Input Field Font
- Change Grid Settings
- Set the Page Size, Orientation, and Default Prompt Alignment
- Insert a Background Image or Color
- Create a New Project from a Project Template
- Create a New Form in an Existing Project
- Open an Existing Project
- Close Project
- Insert or Add a Page
- Name a Page
- Delete a Page
- Undo / Redo
- Use Check Code
- Enter Data
- Use Fields
- Add a New Field
- Edit an Existing Field
- Delete a Field
- Copy, Cut, and Paste Fields
- Align Fields
- Set Field Size
- Set Field Position
- Use Tab Order
- Start New Tab Order
- Customize the Tab Order
- Customize with 'Continue Tab Order'
- Disable Tab
- Use Templates
- Project Templates
- New Project From a Template
- Create a New Template From a Project
- Get Template
- Form and Page Templates
- Field Templates
- Insert a Line
- Upgrade Project
- Make a Project File (PRJ)
- Delete an Existing Data Table Without Deleting the Form
- View a Data Dictionary
- Make Form from Data Table
- Page last reviewed: December 23, 2015
- Page last updated: June 5, 2012
- Content source:


 ShareCompartir